Screaming Frog is every SEO’s best friend. It’s very user-friendly but we can sometimes miss the deeper features that can make our life so much easier.
Here are four features I wish I had known about when I first started working in SEO.
I. Identify Links Pointing to 404s
404s are a recurring problem for most websites and sometimes capacity and resources get in the way of fixing them. Screaming Frog can help you decide which 404 to prioritize, by showing you the internal and external links pointing to them.
Set your crawling mode to “List”, upload your list of 404s and move to the right of the screen, where you will see “Inlinks” and “Outlinks” column. If your 404s does have links pointing to it, select the URL and look at the “Inlinks” and “Outlinks” tab at the bottom of the tool, it will give you information on where the links are coming from. If you have a lot of 404s it might be easier to use the bulk export feature. In the top nav, select Bulk Export > Response Codes > Client Error Inlinks.
II. Web Scraper & Data Extraction
This one takes a little practice and a little trial and error but it’s so useful once you have mastered it.
Screaming Frog already scrapes the most useful information for SEOs such as meta titles, descriptions and H1s, but what if you wanted to scrape all the instances of a CTA button on the site, check for the presence of a certain form, or locate all the whitepapers?
With the Web Scraper tool, you can extract information from any on-page element across the entire website and put together a map of your resources and start creating goals and events to track them.
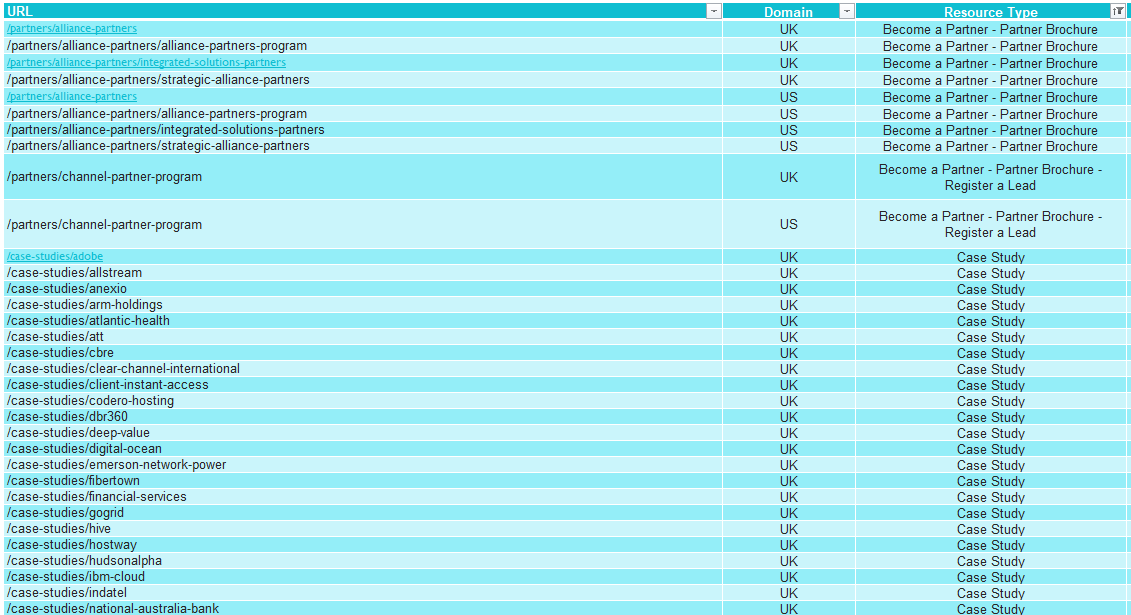
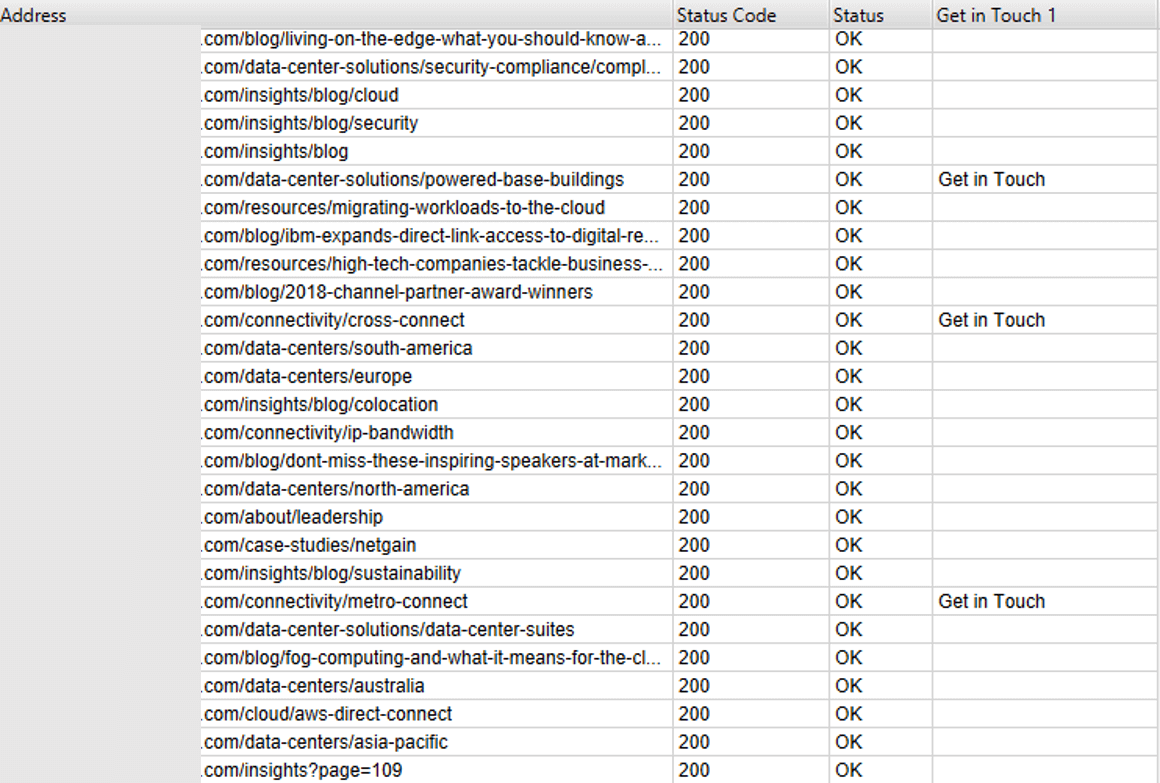
The mapping above was created for a client who wanted to track resources downloads by type. The main issue they were facing was resources not being organized by subfolders, for example some white papers could be found under the /white-papers/ subfolder, but they could also be found on blog pages and partner pages.
Thanks to the Web Scraper we were able to localize where the different resources live and start tracking them appropriately.
Here is how to use Screaming Frog’s scraping tool.
Step 1: Open Configuration > Custom > Extraction
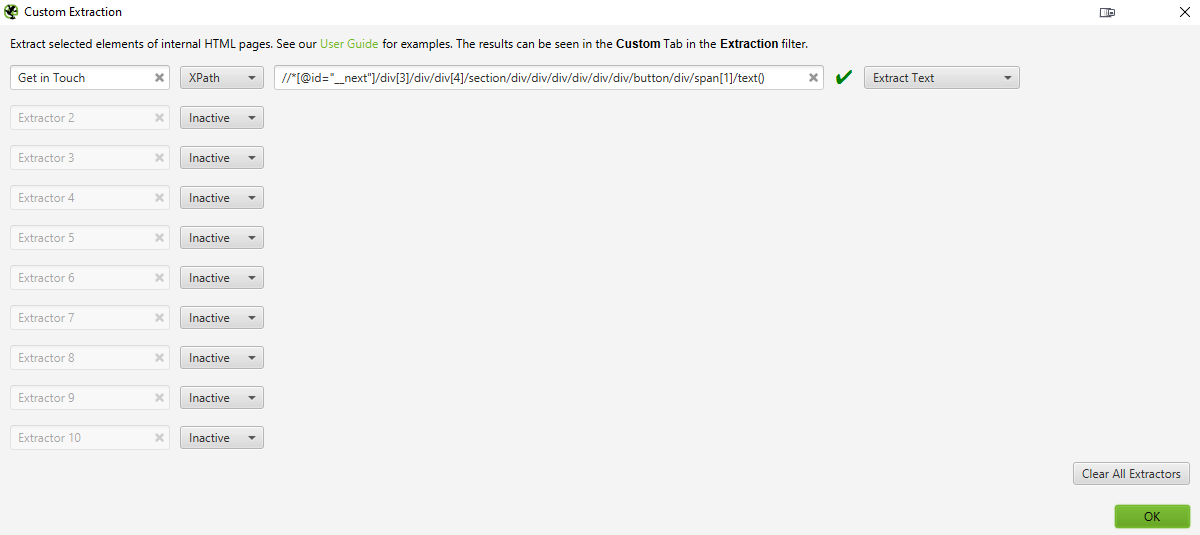
The custom configuration extraction will open up with 10 separate extractors that will be set up to “inactive”.
Step 2: Select the scraping method
There are three methods for scraping data from websites:
- XPath – a query language for selecting nodes from HTML.
- CSS Path –the quickest and easiest of the three! CSS selectors are patterns used to select elements. CSS and XPath are recommended for most cases.
- Regex – A regular expression is a special string of text used for matching patterns. This is best for advanced uses, such as scraping HTML comments or inline JavaScript.
When using XPath or CSS Path you can choose what to extract using the drop down filters:
- Extract HTML Element – The selected element and all of its inner HTML content.
- Extract Inner HTML – The inner HTML content of the selected element. If the selected element contains other HTML elements, they will be included.
- Extract Text – The text content of the selected element and the text content of any sub-elements
Step 3: Input your data
The easiest way to input the data you wish to scrape is, in Chrome, to right click and select “inspect element” on the HTML line of your choice.
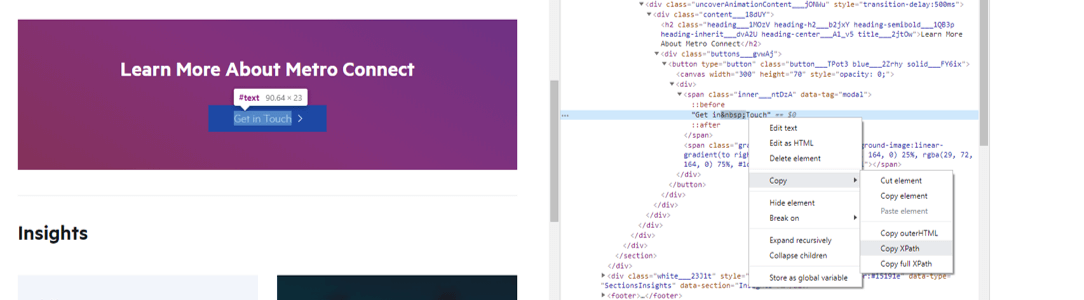
Copy the XPath and paste in in Screaming Frog. You can rename the extractor for better visibility. Here I selected the “Extract Text” because I want to know on which pages the “Get in Touch” form live. Make sure you see a green tick next to your extractor.
Step 4: Scrape away!
Close the extractor pop up, make sure you’re in spider mode and start crawling your website. Make sure you go to the Custom tab, select “Extraction”, and you will see the Web Scraper in action.
III. Crawling Staging Sites
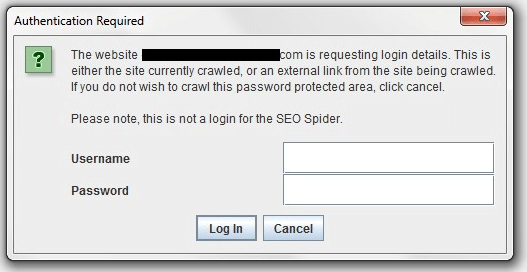
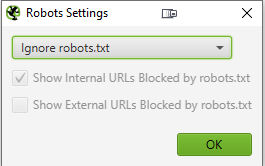
A website migration is a very stressful time and we want to make sure everything is squared away before pushing the new website live. Since we don’t want crawlers to start indexing the staging server they’re always password-protected, blocked by robots.txt or de-indexed, but Screaming Frog allows you to crawl staging sites.
If the website is password-protected, just input your login and start crawling.
If the website is blocked by robots.txt, go to Configuration > robots.txt > settings and select “ignore robots.txt”.
IV. Redirects Audit
Another helpful feature for migrations is the link redirect audit.
Let’s say you’re going to do a site migration and you want to make sure all pages from the old site have been redirected. The redirect audit allows you to input the list of old URLs, crawl them and follow any redirect chain until the final URL is reached. Magic!
Here is the procedure to follow:
1. Before a site migration, make sure you have a list of the old URLs
2. In List mode, upload the list of old URLs
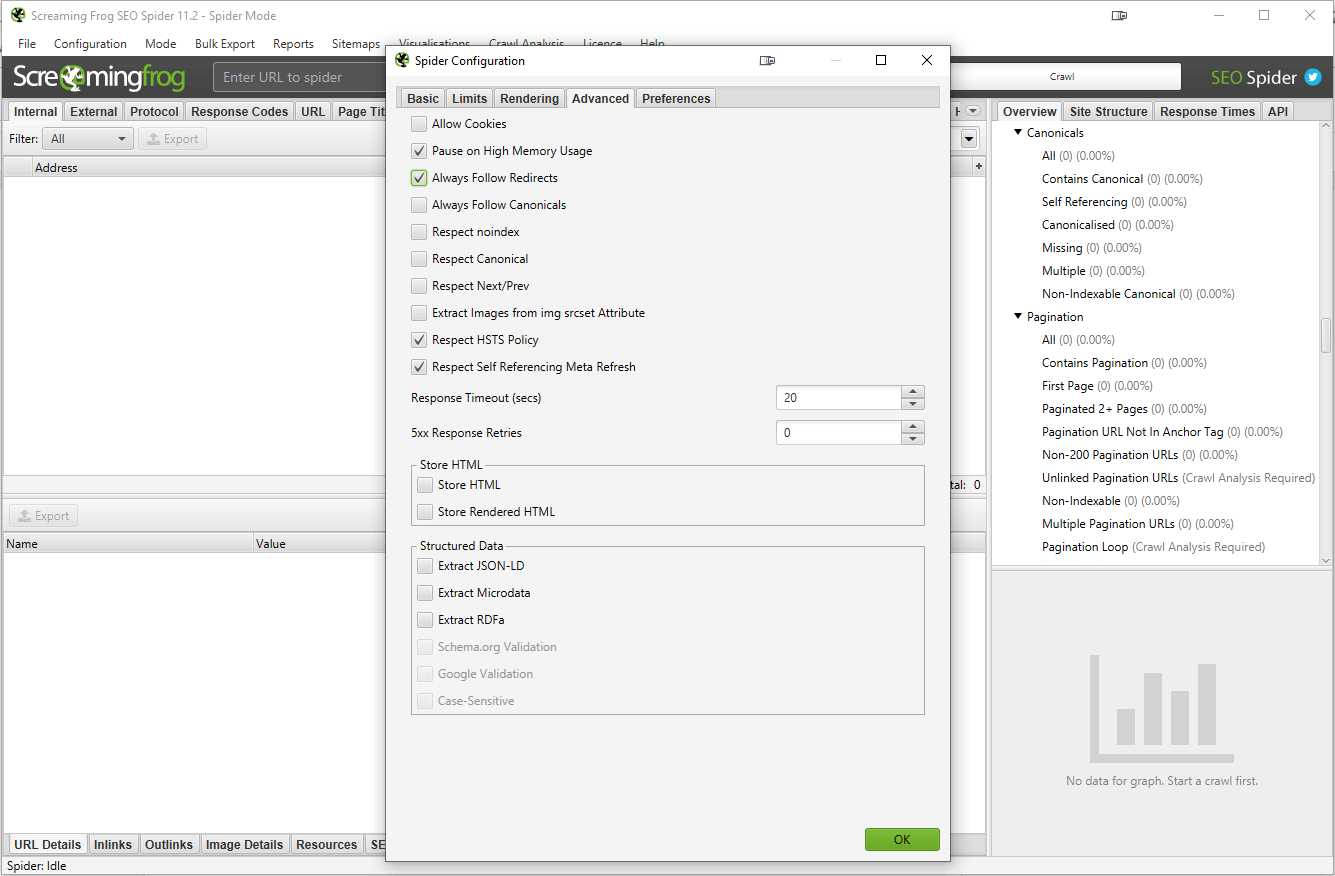
3. Click on Configuration > Spider, then go to the Advanced tab and tick “Always follow redirects”
4. Start the crawl
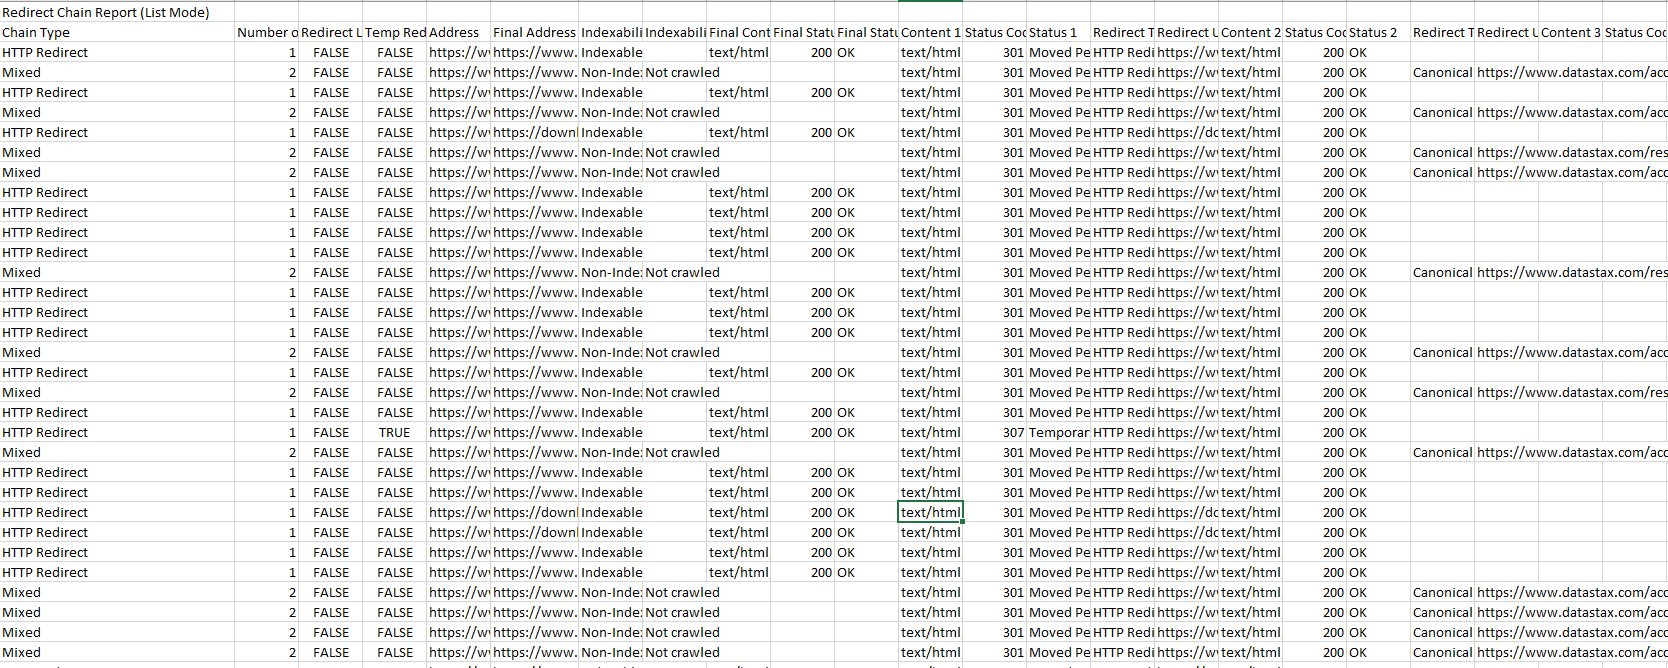
5. Go to the report tab and select “Redirect and Canonical Chains” to export the crawl
6. Voilà, now you have an Excel document with every old URL, current status, redirect type and chain and final URL. With this information, you can shorten the redirect chain by removing the in-between redirects, which will help increase site speed and minimize link equity loss.