Tracking conversions that happen on Pardot forms can be difficult, especially if your forms live in an iframe. In this blog post we will walk through 3 different ways to track Pardot conversions in Google Analytics:
- Tracking conversions on a Thank You Page (internal or external)
- Tracking conversions on a submit button on the form page – recommended if you don’t have a thank you page
- Tracking conversions in iFrames – recommended if your forms live in iFrames
A few housekeeping items to start with:
- Verify the location of the GTM container on your website. The <script> tag should be placed after <head> and <noscript> should be placed after the <body> opening.
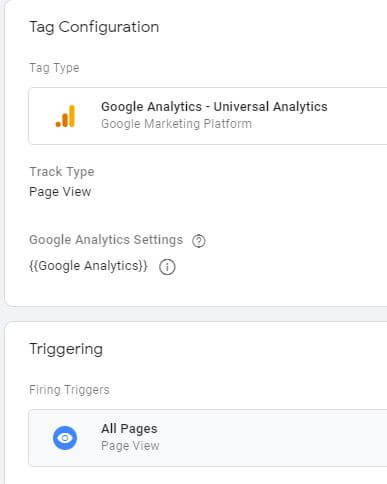
- In GTM, make sure a Google Analytics tag and trigger are created, so information can be passed from GTM to GA.
- In GTM, check all the Form variables so they can be available to use in future tags.
Tracking Conversions on a Thank You Page
Tracking when users land on a URL is the best method for forms that have an internal or external thank you page.
This seems like the easiest option at first, but if your thank you page is on an external domain (such as go.pardot.com), you will be required to set up cross-domain tracking. Otherwise, all organic conversions that fire on the go.pardot.com landing page will be bucketed under referral traffic instead of the actual source.
You will also need to add the GA or GTM (if you use GTM to implement GA on your website, which I definitely recommend) tracking code on the external domains and in your Pardot form layout template and in the source of your external page.
To do so, log into your Pardot account and navigate to Marketing > Landing Pages > Layout Template.
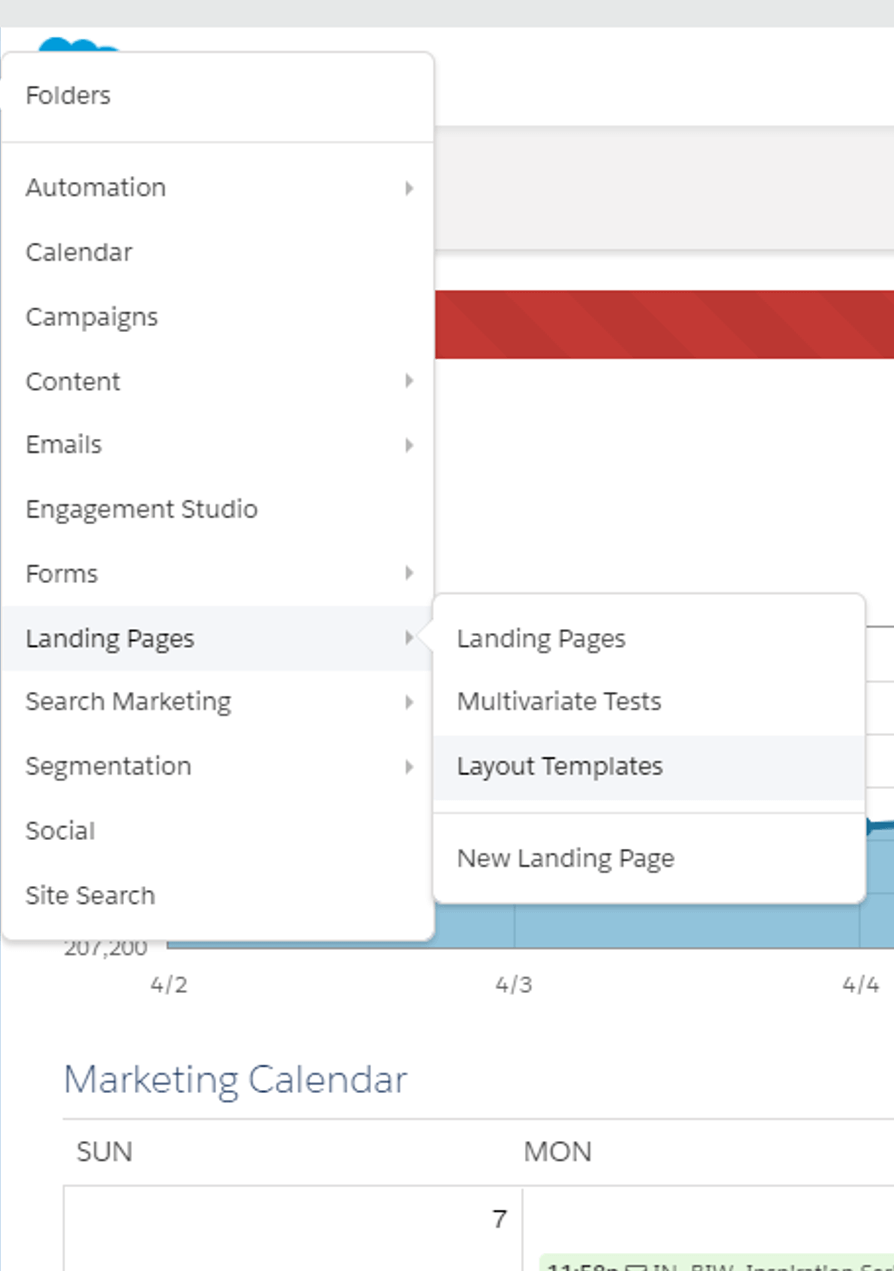
Choose the form you want to track and click on “Edit Layout Template” on the top right corner of your screen. From here add the <script> GTM container after <head> and <noscript> after <body>, if you’re using GTM. Otherwise, just add your GA tracking code in <head>.
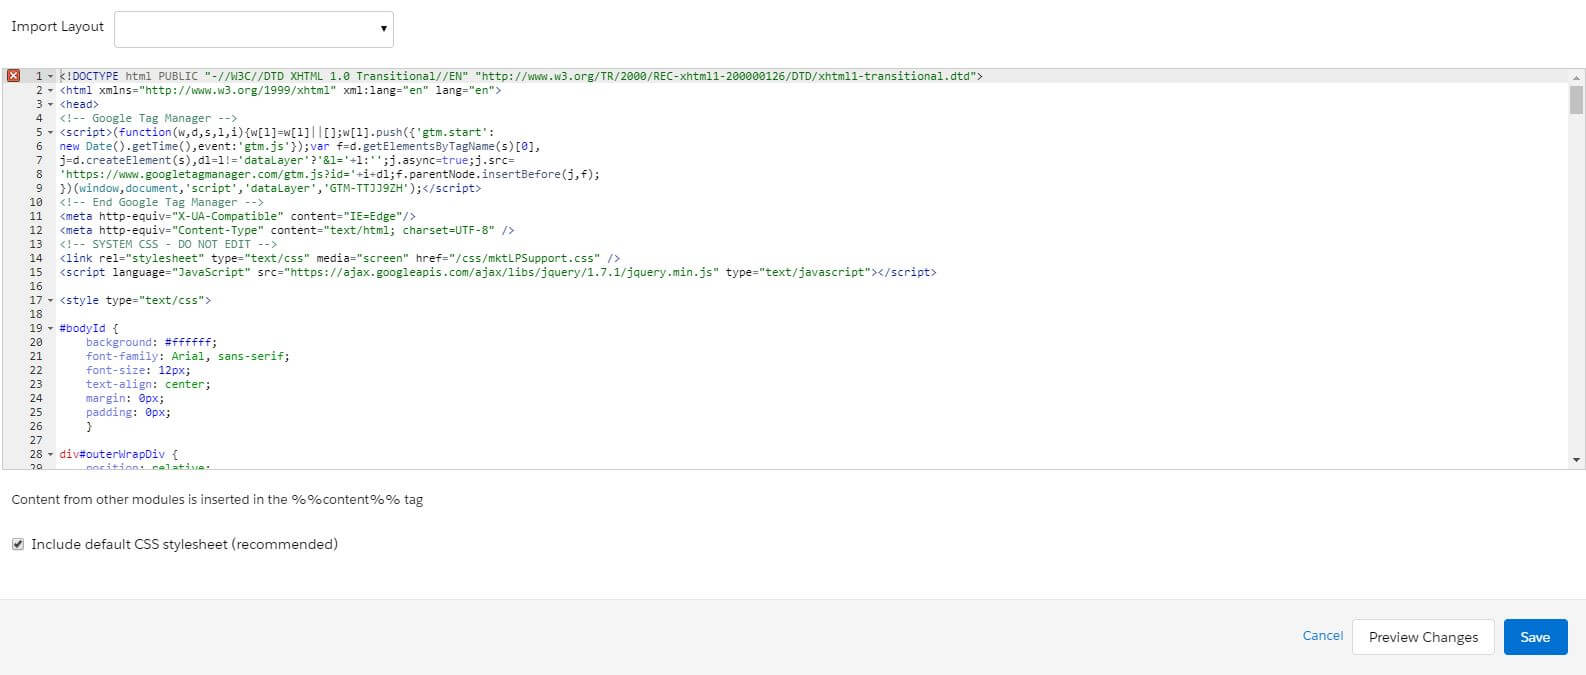
Save and you’re good to go!
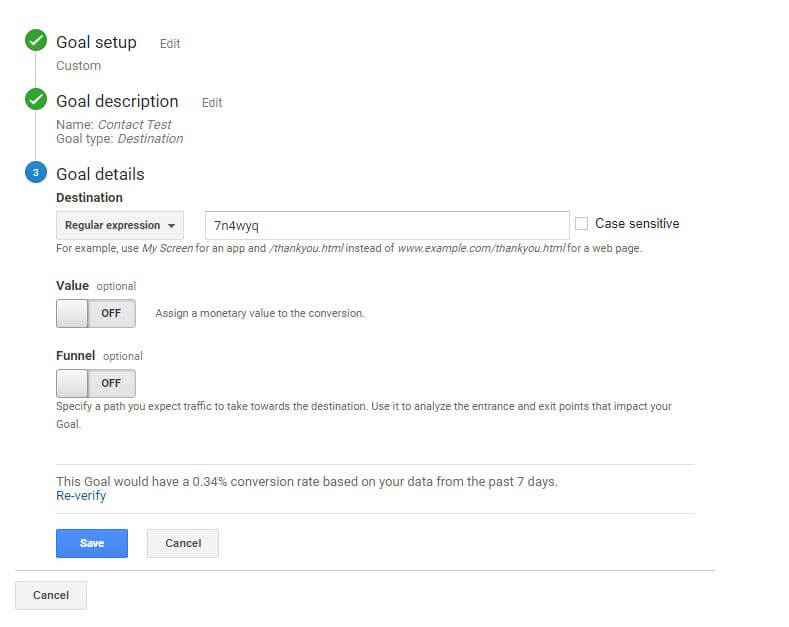
Once cross-domain tracking is implemented and the GA tracking code is implemented in your form layout, you can simply create a destination goal with the URL of the destination page:
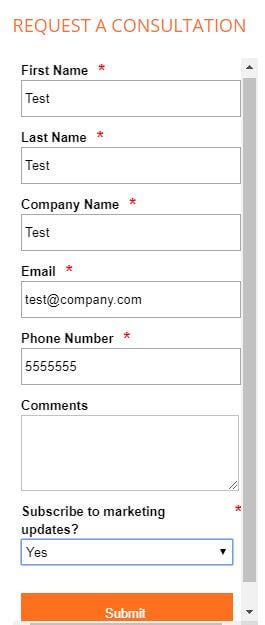
Step 1 – Fill the form

Step 2: Grab the URL of the destination page

Step 3: Create a destination goal in Google Analytics
Step 4: Test yourself in Real-Time as an Organic user
Make sure you’re testing yourself as an organic user and not as a direct user, otherwise you might miss potential issues with cross-domain tracking.

Tracking Conversions on a Submit Button
Another way to track conversions on a Pardot is to track the clicks on a “Submit” button. If your forms don’t have a thank you page, you can use this method.
Let’s go back to our example from above:
Just like in the first option, start by making sure the Pardot form contains your GTM tag.
Step 1 – Inspect button
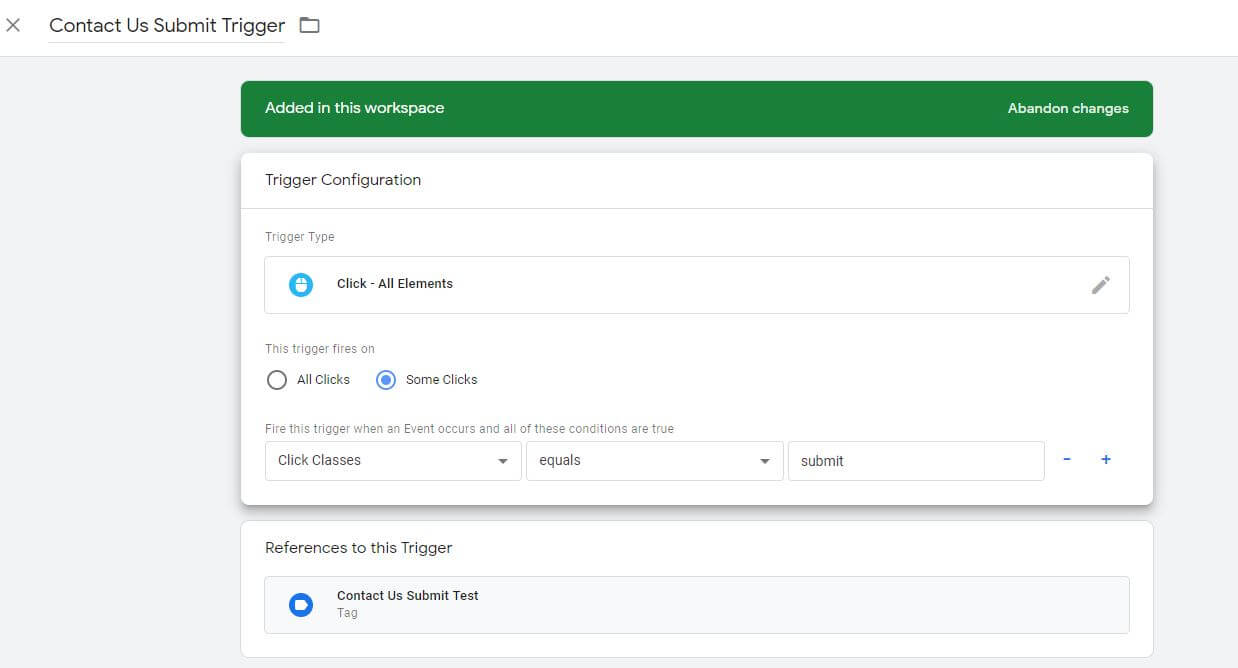
Inspect your Submit button and look for the class= element. Here, “submit”.

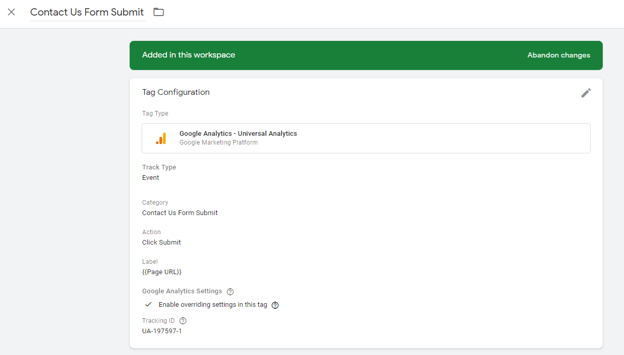
Step 2 – Create appropriate tags
From here you can easily create a Form Submit Tag, Trigger and GA goal based off that tag:

Don’t forget to test your tag in preview before creating the goal!
Tracking Conversions in an iFrame
iFrames make tracking conversions more challenging, but it’s not impossible. You can achieve it using custom JavaScript codes and custom events.
Step 1 – Add JavaScript code to your iframe
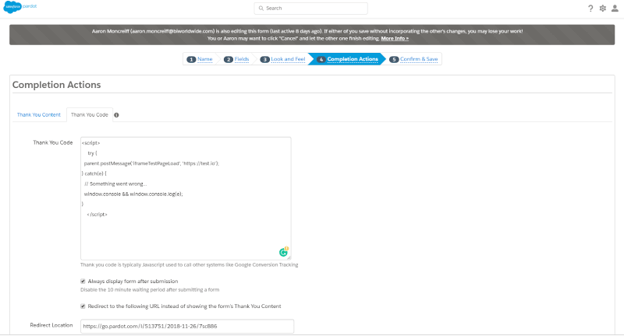
In Pardot, go to Marketing > Forms > Forms, pick the form you want to track and click on Edit Form > Completion Actions > Thank You Code and add this custom JavaScript code, so that GTM loads within the iFrame.
<script>
try {
parent.postMessage(‘iframeTestPageLoad’, ‘https://www.website.com‘);
} catch(e) {
// Something went wrong…
window.console && window.console.log(e);
}
</script>
Step 2 – Create listener tag
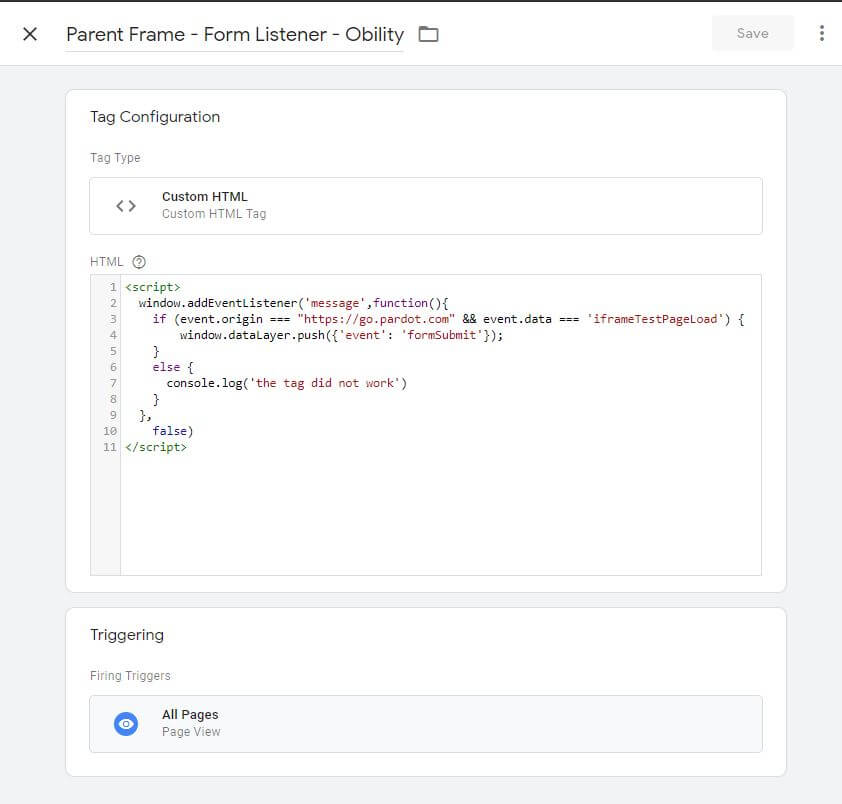
In GTM, create a Tag with a custom HTML for GTM to listen to new code within the iframe.
<script>
window.addEventListener(‘message’,function(){
if (event.origin === “https://go.pardot.com“ && event.data === ‘iframeTestPageLoad’) {
window.dataLayer.push({‘event’: ‘formSubmit’});
}
else {
console.log(‘the tag did not work’)
}
},
false)
</script>
The trigger associated with this tag fires on all page views. Test it in preview, the Listener should fire on all pages.
Call this tag “Parent Frame – Form Listener”.
Step 3 – Send information to GA
Create a new GTM tag to send that information to GA. I suggest calling it “Pardot Form GA Event”. Create an associated trigger, “Pardot GA Event Trigger – Form Submit”. The trigger is a simple custom event name formSubmit, since that’s what we called it in the custom code in Step 2.

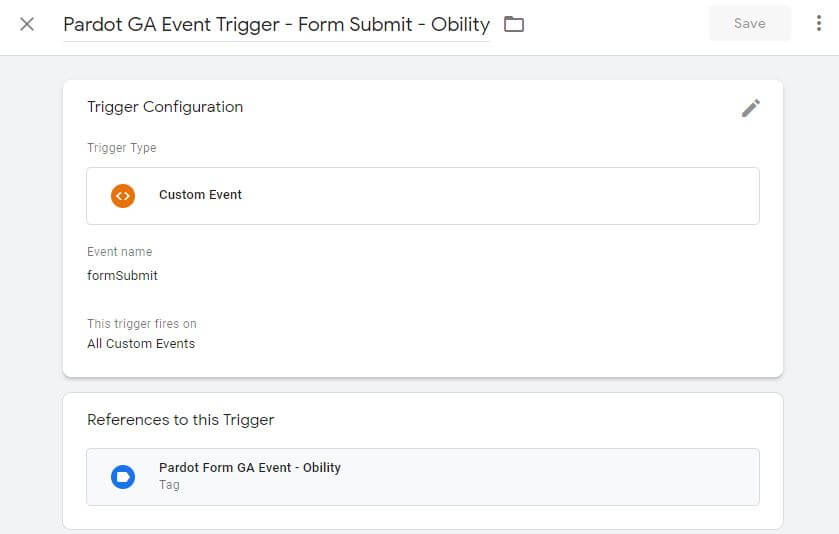
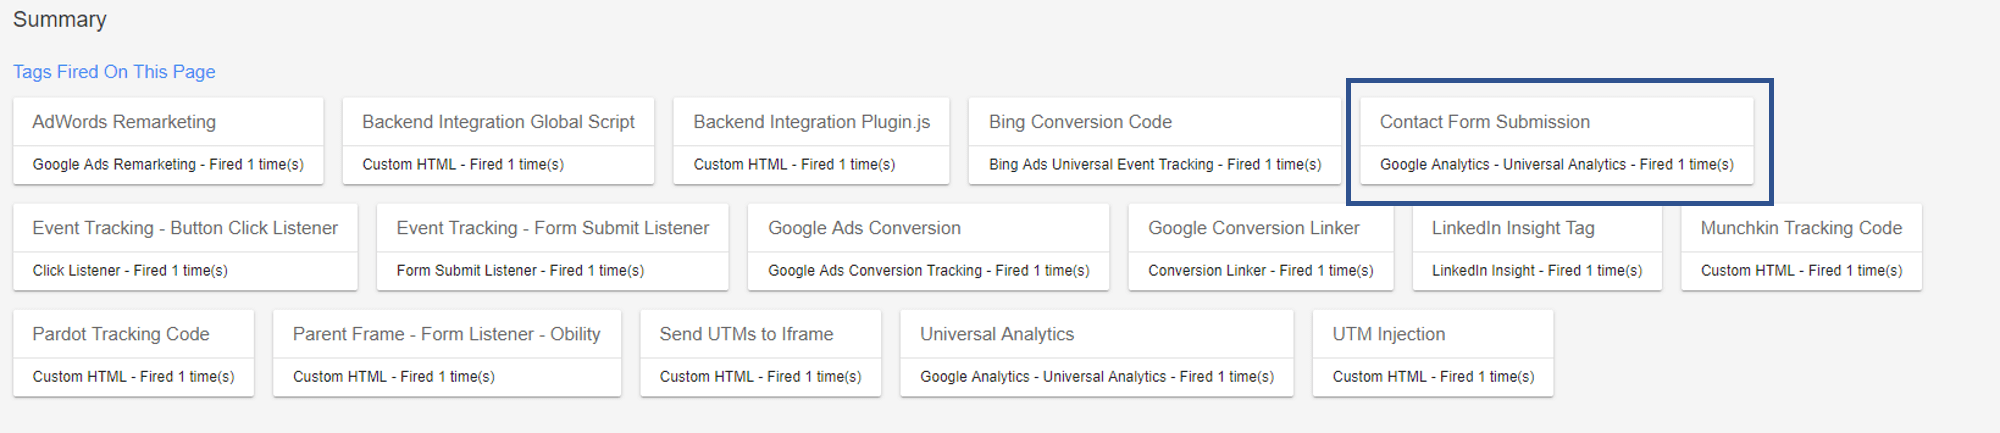
Test in preview and make sure it fires properly upon contact form submission.

From here you can create a goal based on the Pardot Form GA Event tag and track your form submissions in Google Analytics.
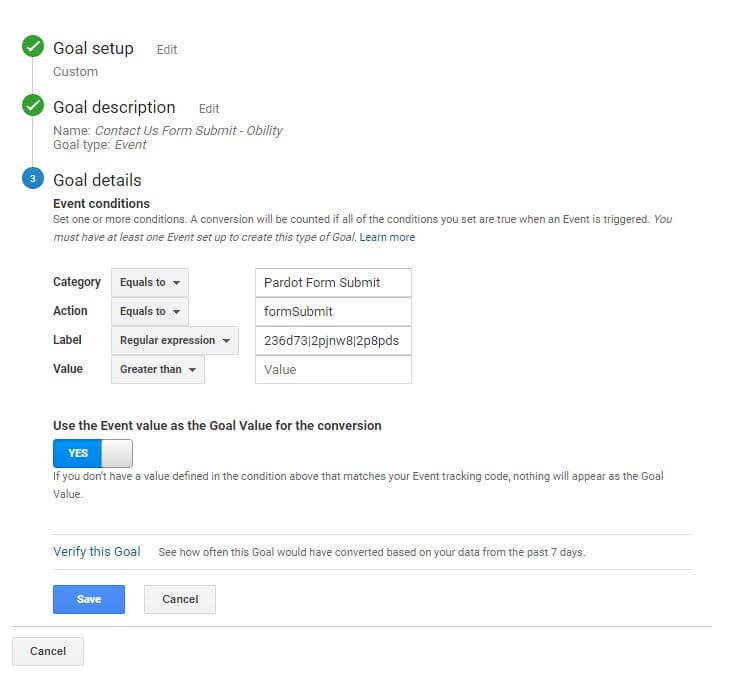
Now all your conversions should be successfully tracked in Google Analytics!
Get your answer in a day
- This field is for validation purposes and should be left unchanged.